Address
Building 1, No. 22, Shexi Yongping Road,
Dongguan, Guangdong, China
Work Hours
Monday to Friday: 7AM - 7PM
Weekend: 10AM - 5PM
Address
Building 1, No. 22, Shexi Yongping Road,
Dongguan, Guangdong, China
Work Hours
Monday to Friday: 7AM - 7PM
Weekend: 10AM - 5PM
A safe seam is flat, fully adhered and no thicker than the panel edge. Use a low-tack tape wide enough to bridge both panels, ... Ask Mingskye for a sample.
A safe seam is flat, fully adhered and no thicker than the panel edge. Use a low-tack tape wide enough to bridge both panels, press it down along its whole length, and never overlap tape layers at a crossing. Check seams at the start of each shift, because a lifted corner catches a boot or a trolley wheel long before the panel itself wears out.
This page covers protection board seam tape in six sections: Taping seams without creating a trip hazard or; Preparing the floor before any panel is laid; Inspection: what to check and how often; Handover: what the protection should look like at; Protecting walls, door leaves and vulnerable corners; Protecting stair treads and risers during fit-out. Each section answers one practical question and can be read on its own.
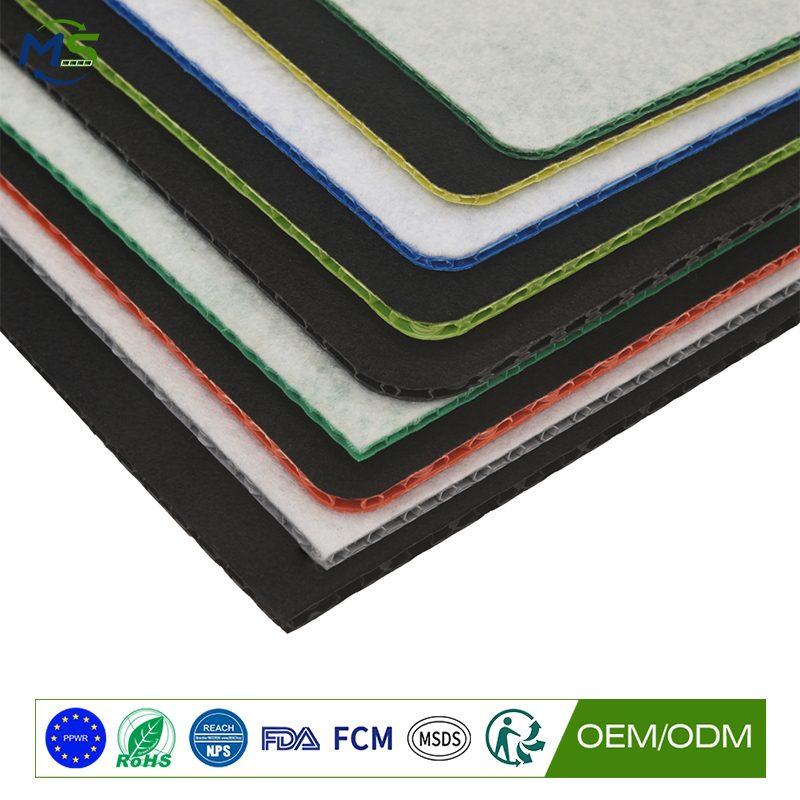
A taped seam should be flat, continuous and no higher than the panel surface, and the tape matters less than the way it is applied.
The purpose of taping a seam is to stop the panels lifting and to stop grit tracking through the joint. Both are achieved with a tape that is applied to a clean, dry surface and pressed down along the full length of the joint.
Tape should run on the flat top of the panel, not across the edge of a cellular core, because a tape bridge over the edge will lift the first time traffic crosses it. Where the panel has a chamfered edge, the tape should follow the flat land.
On a surface that will be seen, the seam can be scribed to the edge of the panel above so that it is invisible in the finished view. It is worth deciding this at the outset, because the technique differs from a standard taped joint.
Preparation takes less time than the delay caused by laying panels on a floor that was not ready, and it is the step that protects the substrate as much as the panel does.
The sequence is simple: remove debris, sweep, inspect for sharp edges or laitance, confirm the floor is dry where that matters, and only then start laying. A vacuum rather than a broom leaves less fine grit behind, and fine grit is what causes the scratches.
On a screed, the surface must be hard enough to take the load and free of loose material. Newly screeded floors need curing time before they are loaded, and covering a green screed with an impervious panel traps moisture and weakens it underneath.
Mark the layout before laying. Setting out the panel grid on the floor first avoids the situation where panels are cut short at the end of a run and a mismatched strip is left along a wall, which is both a visual problem and a weak point in the coverage.
For terminology and test-method context see UK Health and Safety Executive. The guidance on this page is practical site guidance, not a test report or a certificate.
A short inspection on a fixed cycle finds a damaged panel before it damages the floor, which is the whole purpose of the protection.
Check for puncture first, especially where equipment stands, and look for any area where the facing is broken or the core is exposed. A puncture is the point at which the substrate below is exposed, and it should be repaired or the panel replaced immediately.
Then check for deformation. A panel that shows a permanent indentation under a load that used to be within its rating has lost capacity and should come out of service, even if it still looks intact.
Then check the seams and edges, because these fail before the panel does. A lifted seam traps grit and the grit causes the scratching. A final check should be made after each trade has finished with an area and before the area is handed over.
| Site question | Short answer | What to check before starting | In this guide |
|---|---|---|---|
| What should be checked about taping seams without creating a trip … | A taped seam should be flat, continuous and no higher than the panel surface, and the … | The purpose of taping a seam is to stop the panels lifting and to stop … | Section 1 |
| What should be checked about preparing the floor before any panel … | Preparation takes less time than the delay caused by laying panels on a floor that was … | The sequence is simple: remove debris, sweep, inspect for sharp edges or laitance, confirm the … | Section 2 |
| What should be checked about inspection: what to check and how … | A short inspection on a fixed cycle finds a damaged panel before it damages the floor … | Check for puncture first, especially where equipment stands, and look for any area where the … | Section 3 |
| What should be checked about handover: what the protection should look … | The protection is part of the finished appearance, and the handover standard should be agreed with … | Agreeing the handover condition in advance removes almost all dispute. The standard can specify that … | Section 4 |
The protection is part of the finished appearance, and the handover standard should be agreed with the client before the first panel is laid.
Agreeing the handover condition in advance removes almost all dispute. The standard can specify that the floor is free of grit, that no seam tape remains, that edges are trimmed and that the panels are presented with a consistent facing and a consistent direction of lay.
Consistency of appearance matters more than perfection. Panels laid in the same direction, with the seam lines running in one orientation, read as a deliberate installation. Mixed directions and mixed grades read as a temporary site arrangement even when the floor underneath is perfect.
It is worth photographing the protected area at handover with the client, because that resolves any later disagreement about the condition of the substrate at the point protection was removed.
Wall and corner protection is the cheapest damage prevention on a site, and it should be installed before the traffic that causes it arrives.
Vertical protection is a good-value use of a reusable panel because it is neither loaded nor crossed. A panel fixed to the wall face with a low-tack tape or with straps over the top of the panel protects against trolley handles, door leaves and people carrying material.
Door leaves need specific attention because they swing. A cardboard or sheet protector fixed to the leaf at the handle height prevents the damage that a swinging handle causes to a painted frame, and it takes a couple of minutes per door.
Corners are the highest-risk detail on most refurbishment sites. A corner guard or a wrapped panel section at the door jambs and lift lobbies will prevent the impact damage that no amount of floor protection addresses.
Stairs are the point on a refurbishment site where protection is most needed and most often fitted badly.
A stair tread sees concentrated point loads because a foot or a hand truck wheel lands on a small area, and it sees them at an angle rather than flat, which loads the nosing and the front edge hardest. A tread protector should therefore cover the nosing and the first part of the tread, not just the flat centre.
The panel must be fixed so it cannot slide. On a stair, friction alone is not enough, and the fixing has to be mechanical or bonded in a way that can be removed without damaging the finish. On marble and stone, mechanical fixing into the tread is not acceptable, so an approved adhesive or a weighted arrangement is used instead.
Risers need protection as well, because they take the scuffs from feet and material being carried. A flexible protector on the riser costs little and prevents the marking that makes a completed staircase look neglected on handover.
A taped seam should be flat, continuous and no higher than the panel surface, and the tape matters less than the way it is applied. The purpose of taping a seam is to stop the panels lifting and to stop grit tracking through the joint. Both are …
Preparation takes less time than the delay caused by laying panels on a floor that was not ready, and it is the step that protects the substrate as much as the panel does. The sequence is simple: remove debris, sweep, inspect for sharp edges or laitance, confirm the floor is dry where that matters, and …
The protection is part of the finished appearance, and the handover standard should be agreed with the client before the first panel is laid. Agreeing the handover condition in advance removes almost all dispute. The standard can specify that the floor is free of grit, that …
Stairs are the point on a refurbishment site where protection is most needed and most often fitted badly. A stair tread sees concentrated point loads because a foot or a hand truck wheel lands on a small area, and it …
References checked by publisher and title on 2026-11-06. Standards and regulations are cited by name only; no performance values are attributed to them. General material-property figures in the text are indicative reference values for polypropylene and should be verified against your supplier’s current data sheet. Confirm applicability and current versions for your own project before relying on any of them.
For a quotation, a sample panel or help matching a thickness and facing to your site conditions, contact service@mingplastics.com or WhatsApp +86 189 3887 1524. Include the surface type, floor area, the trades working overhead and the expected duration so the recommended specification can be confirmed before you order.
For protection board seam tape, Walk the route, agree the seam method and photograph the floor before the first panel is laid. Stairs are the point on a refurbishment site where protection is most needed and most often fitted badly.